Why Space Matters When Starting Your Woodshop
Starting woodworking can feel exciting, but overwhelming too. One big question beginners ask is: how much space for woodshop do I really need? Many think you need a huge garage or dedicated barn. That's not true!
You can start small, even in under 400 square feet. This guide focuses on tiny setups perfect for beginners. We'll cover everything from a shed under 100 square feet to a small garage corner.
Why does space matter? Poor layout leads to frustration, accidents, and inefficiency. Good planning lets you work safely and enjoy the craft. Think of your shop like a kitchen: too cramped, and cooking's a chore. Spacious enough, it's fun.
As a beginner, starting small builds confidence without big costs. You won't buy tools you don't need yet.
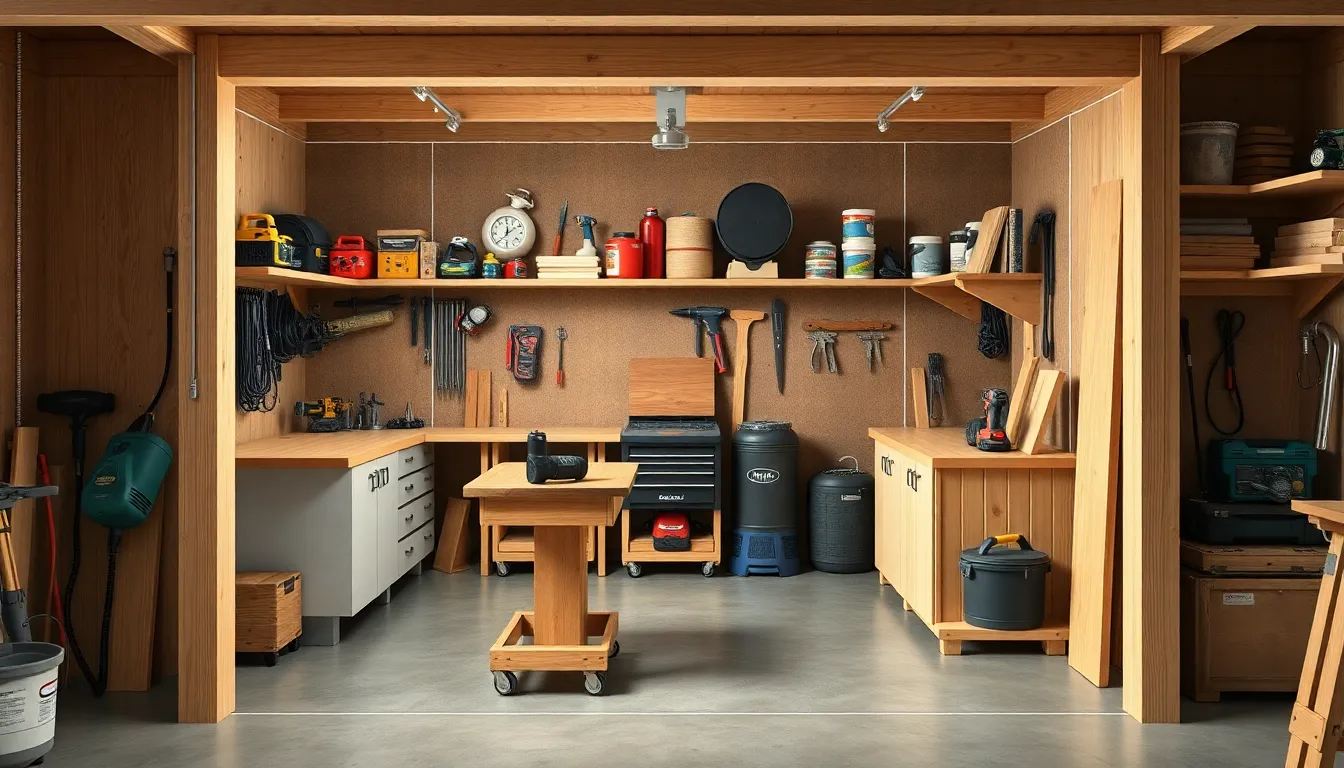
Essential Zones in Any Woodshop
Every woodshop needs key zones. These are dedicated areas for tasks. Define them simply:
- Workbench zone: For hand tools and assembly.
- Tool storage: Where power tools live.
- Assembly area: Flat space for gluing and clamping.
- Finishing zone: Dust-free spot for sanding and painting.
- Dust collection and materials: For vacuums and lumber storage.
In small spaces, zones overlap. That's okay! Use mobile carts to shift them.
Visualize zones like puzzle pieces. They fit tight with smart planning.
Tiny Shed Woodshops (Under 100 Square Feet)
Perfect for apartments or backyards. A 8x10 shed (80 sq ft) works great.
Minimum Needs
You need room for basics: workbench, miter saw, drill press maybe.
A fold-down workbench saves space. It's a wall-mounted table that flips up when not used.
Layout Example
Picture a 10x8 shed.
- Wall A: Fold-down bench (4 ft wide).
- Wall B: Pegboard for hand tools.
- Corner: Small miter saw station.
- Floor center: Rolling cart for sander and dust collector.
Dust collectors are shop vacs here. They fit under benches.
Tools That Fit
- Table saw? Skip it. Use circular saw with guides.
- Bandsaw: Compact 9-inch model on a mobile base.
Mobile bases are wheels you attach to tools. Roll them out when needed.
Pros and Cons
Pros:
- Cheap to set up.
- Portable if you move.
- Low dust issues outdoors.
Cons:
- Weatherproofing needed.
- Limited projects (small boxes, not tables).
Real example: Many start with birdhouses here. One Redditor built a full kitchen in a 64 sq ft shed!
Garage Corner Setups (150-300 Square Feet)
Use half your single-car garage. Say 10x15 ft (150 sq ft).
Why This Size Rocks for Beginners
Enough for a table saw, but cozy. Great for weekend warriors.
Key Zones Breakdown
- Workbench: 4x8 ft against wall.
- Tool storage: French cleats (wooden rails for hanging shelves).
- Assembly: Next to bench.
- Finishing: Portable booth (PVC frame with plastic).
- Dust/materials: Overhead racks for lumber.
Dust collection: 1-2 HP collector in corner. Pipes run along ceiling.
Impact of Big Tools
Table saws need 10x10 ft clear space (including outfeed). Place near door for plywood.
Jointers/planers: Wall-mounted or on carts.
Analogy: Like a desk in your bedroom. Everything has a spot, but you rearrange for big tasks.
Sample Layout Sketch
Imagine:
| Zone | Size | Location |
|---|---|---|
| Workbench | 4x6 ft | Back wall |
| Table saw | 10x10 ft clearance | Center |
| Storage | Full wall | Side |
| Finishing | 6x6 ft | Corner |
This leaves paths 2-3 ft wide. Safety first!
Small Garage Woodshops (Under 400 Square Feet)
Full single garage, minus car space. 20x20 ft (400 sq ft max here).
Scaling Up Comfortably
Now add radial arm saw or CNC router later.
Optimized Zones
- Workbench: L-shaped for efficiency.
- Assembly: 8x8 ft island.
- Finishing: Enclosed booth (buy pre-made for $200).
- Dust/materials: Ceiling hoist for sheet goods.
Dust collectors shine here. A 3 HP unit serves all tools.
Tool Layout Tips
Big tools like 10" table saws dictate flow. Place so infeed/outfeed aligns with doors.
Bandsaws and lathes on mobile bases. Park against walls.
Example: Flow like a factory line. Rough cut → joint → assemble → finish.
Maximizing Small Spaces: Pro Tips
Small shops thrive on clever hacks.
Mobile Everything
Attach bases to saws, sanders. Cost: $50 each.
Roll to center, work, roll away.
Wall Storage Magic
- French cleats: Sliders for shelves.
- Pegboards: For bits, clamps.
- Overhead: Pulleys for lumber.
Analogy: Like IKEA hacks for tiny apartments.
Vertical Thinking
Stack tools. Drill press above miter saw shelf.
Multi-Use Furniture
Workbench doubles as outfeed table.
Lighting and Power
LED strips everywhere. 20-amp circuits minimum.
Common Mistakes in Small Woodshop Layouts
Avoid these pitfalls.
- Cramming too many tools early. Start with 5 essentials.
- Ignoring workflow. Don't put sander next to finish area—dust travels!
- Poor dust control. Vacuum everything; health risk.
- No safety paths. Keep 3 ft aisles.
- Overlooking electrics. Extension cords cause fires.
One beginner story: Bought huge saw, no room to use. Sold it cheap.
Scaling Your Shop as Skills Grow
Start tiny, expand smart.
Beginner (0-6 months): Shed, hand tools.
Intermediate: Garage corner, add table saw.
Advanced: Full 400 sq ft, CNC.
Within limits: Add vertical storage yearly.
Don't overcommit. Rent tools for big projects.
How to Assess Your Own Space
Measure twice!
- Sketch floor plan.
- List must-have tools.
- Mark zones with tape.
- Test workflow: Walk through cuts.
- Budget: $500-2000 startup.
Tools for this: Free apps like Floor Plan Creator.
Is 100 sq ft enough? Yes for boxes. 300? Full furniture.
Encouragement: Your first shop doesn't need perfection. Build, learn, tweak.
Next Steps to Launch Your Woodshop
Ready?
- Measure space today.
- Buy workbench plans (free online).
- Essential starter kit: Circular saw, clamps, sander.
- Join forums like Lumberjocks.
- Build a simple shelf first.
Woodworking's about joy, not size. You've got this—start small, dream big!
(Word count: 1987)